Safe Anchoring Techniques: Avoiding Drifts, Collisions, and Grounding
Anchoring is one of the most important — and most misunderstood — boating skills. A properly set anchor keeps your vessel secure during lunch stops, overnight stays, or emergencies. A poorly set one can let your boat drift into danger or even run aground.
Whether you’re boating on a calm lake or a tidal bay, knowing how to anchor safely will protect your vessel, your passengers, and others around you. Here’s how to choose the right gear, pick a safe spot, and set your anchor with confidence.
1. Why Proper Anchoring Matters
Anchoring isn’t just about stopping; it’s about staying put. A secure anchor:
-
Prevents drifting into rocks, reefs, or other boats
-
Keeps the bow pointed into wind or current for stability
-
Allows you to rest, fish, or ride out weather safely
Improper anchoring leads to the three most common boating accidents at rest: drifting, collisions, and groundings. These mishaps are avoidable with proper technique and preparation.
2. Know Your Equipment
Anchor Types
Different anchors are designed for different seabeds:
|
Anchor Type |
|
Best For |
Notes |
|---|---|---|---|
|
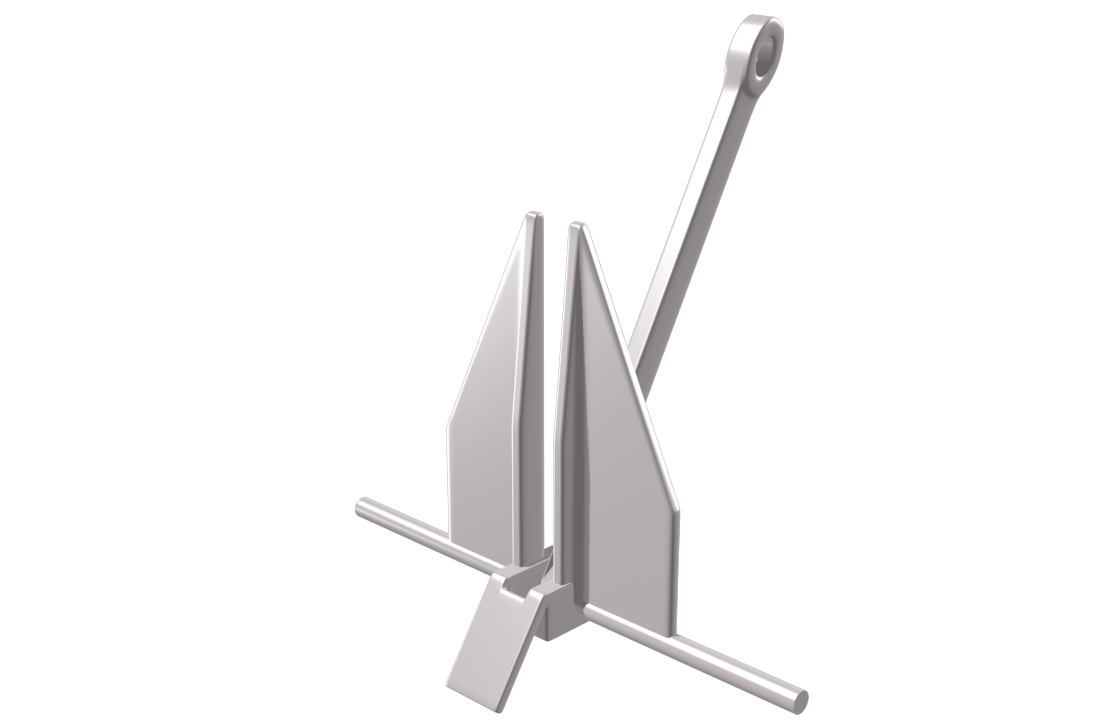
Fluke (Danforth) |
|
Sand, mud |
Lightweight, great holding in soft bottoms; poor in rocks or weeds |
|
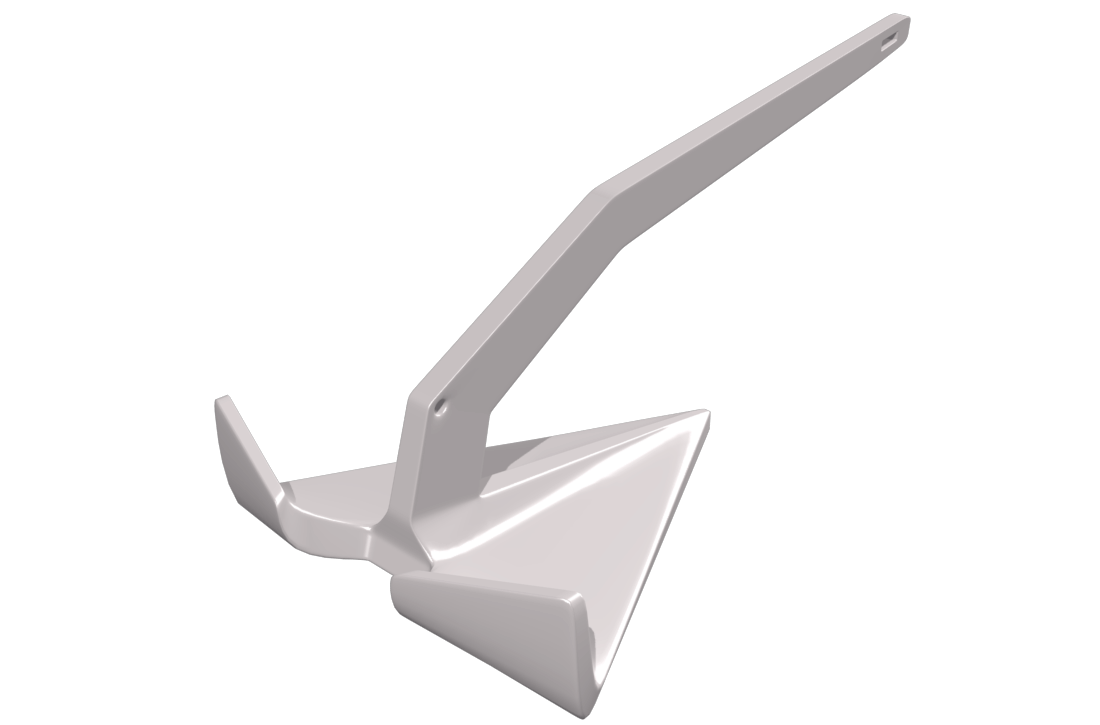
Plow (CQR, Delta) |
|
Sand, mud, clay, gravel |
Good all-purpose choice for cruisers |
|
Mushroom |
|
Lakes, long-term moorings |
Not for heavy weather; low holding power |
|
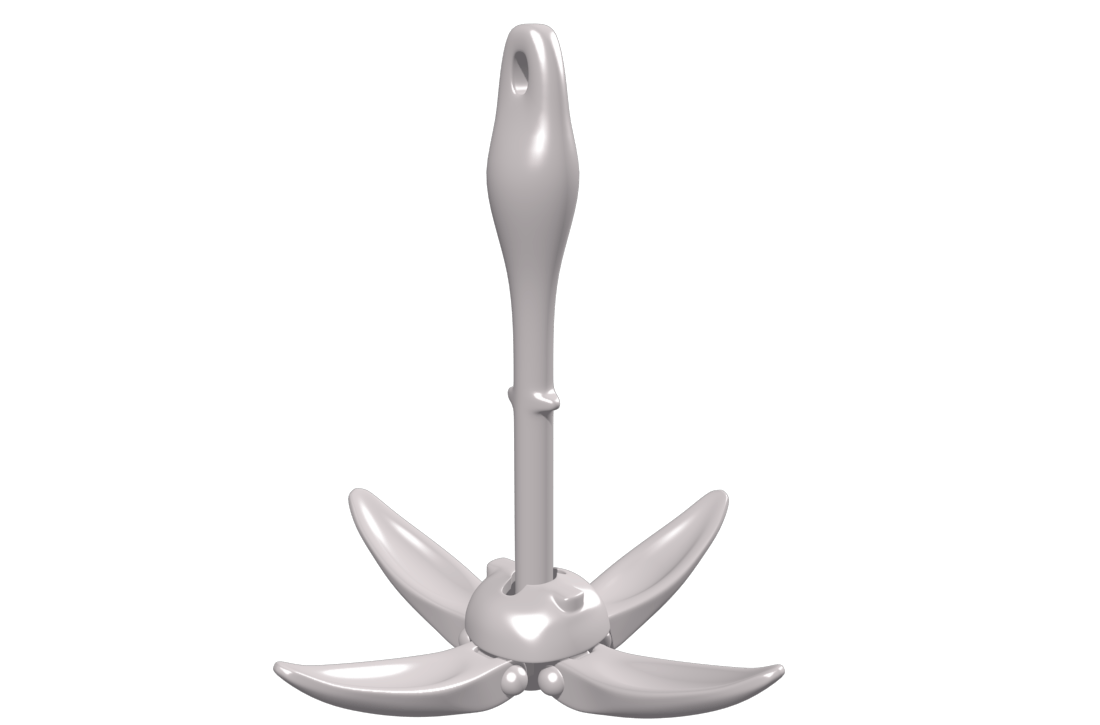
Grapnel |
|
Rocky or coral bottoms |
Compact; used for small boats or dinghies |
Choose an anchor suited to your boat’s length and local conditions. Always carry at least one primary anchor and, if possible, a secondary (kedge) anchor for emergencies.
Anchor Rode
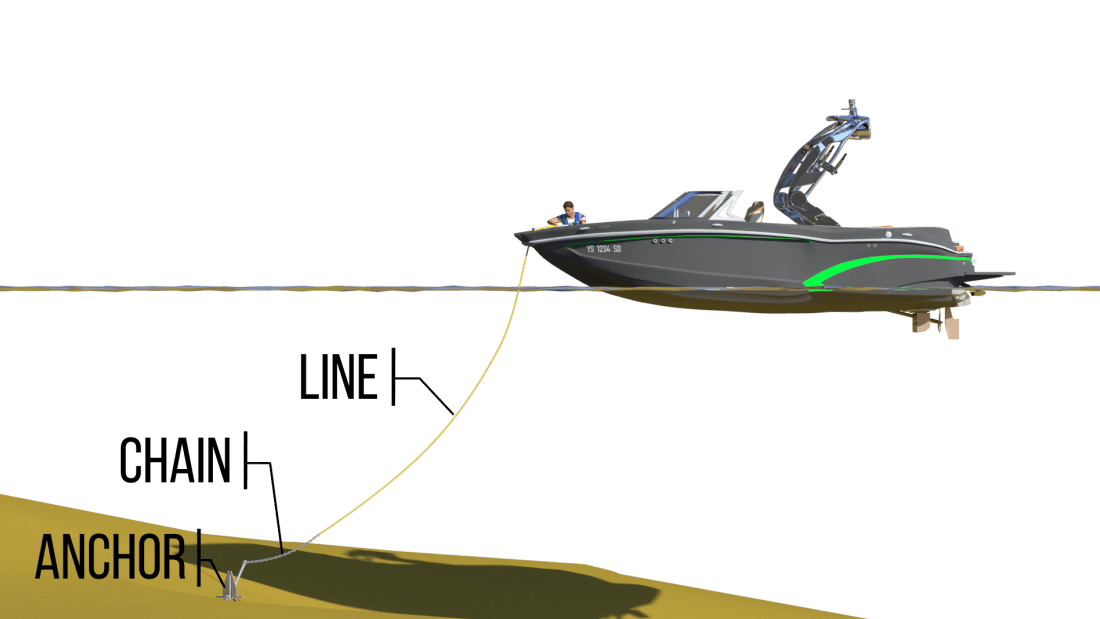
The rode connects your anchor to the boat. It usually includes:
-
Chain: Heavy and abrasion-resistant; improves holding by lowering the pull angle.
-
Rope (nylon): Provides stretch and shock absorption.
A typical setup is 6–10 feet of chain per 25 feet of boat followed by nylon rope. Ensure all shackles, splices, and thimbles are strong and corrosion-free.
3. Choosing a Safe Anchoring Location
Anchoring begins with smart location choice. Look for:
-
Shelter from wind and waves (behind a headland or within a cove).
-
Adequate depth: Deep enough for your boat at both high and low tide.
-
Good holding ground: Sand or mud is ideal; avoid weed or rock when possible.
-
Room to swing: Boats pivot around their anchors as wind or current shifts — leave enough radius to avoid other vessels or obstructions.
Check charts for depth contours, rocks, cables, and restricted zones. Always anchor outside of channels and fairways.
4. Calculating Scope: How Much Line to Let Out
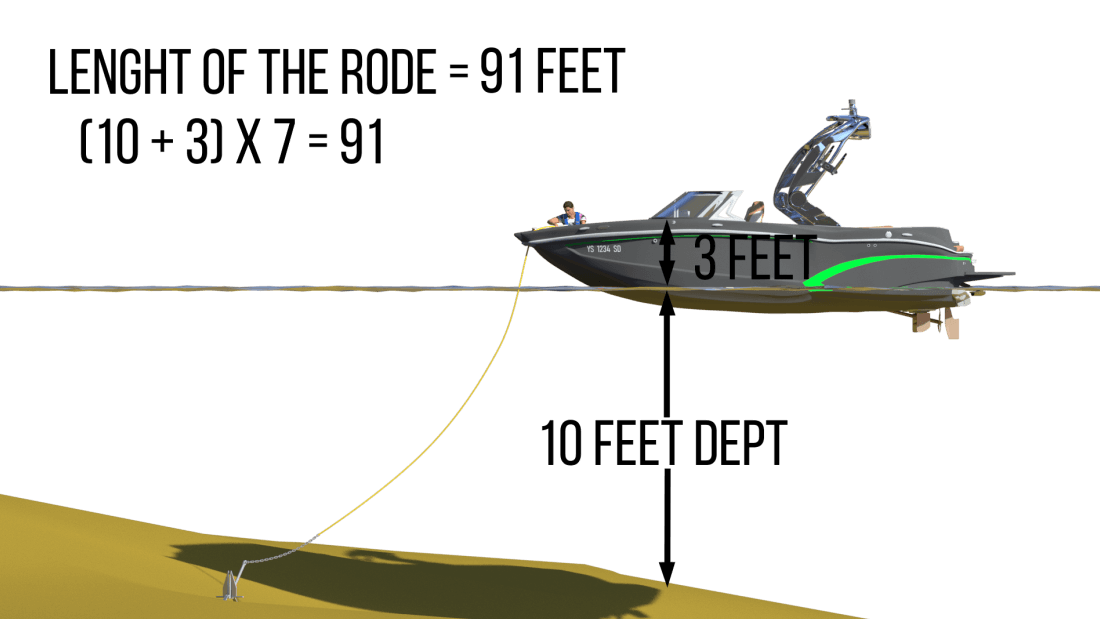
The scope is the ratio of the rode length to the water depth (plus the distance from the bow to the water). A longer scope creates a shallower pull angle and better holding.
|
Conditions |
Recommended Scope |
|---|---|
|
Calm weather |
5:1 (five feet of rode per foot of depth) |
|
Moderate wind |
7:1 |
|
Heavy weather or overnight |
10:1 |
Example: In 10 feet of water with 3 feet from bow to water, use (10+3) × 7 = 91 feet of rode for a 7:1 scope.
More chain increases holding power; if limited space prevents long scope, add extra chain to compensate.
5. The Anchoring Procedure
Follow these steps for a proper set every time:
Step 1: Prepare
-
Remove anchor from its holder and lay out rode so it will pay out smoothly.
-
Check for nearby boats, buoys, or rocks.
-
Note wind and current direction — you’ll drift backward as you set the anchor.
Step 2: Position the Boat
Approach slowly into the wind or current and stop the boat at the point where you want the anchor to lie on the bottom. This ensures the boat drifts backward naturally when setting.
Step 3: Lower, Don’t Throw
Lower the anchor hand over hand until it rests on the bottom. Throwing it can tangle the rode or damage gear.
Step 4: Pay Out Rode
As the boat drifts backward, release the rode gradually while keeping light tension. Allow it to lay out straight in line with the boat’s drift.
Step 5: Set the Anchor
Once enough rode is out:
-
Snub the line (wrap it briefly around a cleat) to help the anchor dig in.
-
When resistance is felt, apply reverse engine power at idle for a few seconds to confirm it’s holding.
Mark your position visually (shore landmarks) or on GPS to detect future drift.
Step 6: Secure the Rode
Once set, tie off the line to a bow cleat using a proper cleat hitch. Do not rely solely on the windlass to hold the load.
6. Checking the Hold
Even a properly set anchor can slip if the seabed is poor or wind shifts.
-
Line up two fixed landmarks on shore. If they move out of alignment, you’re drifting.
-
Use GPS or an anchor alarm app to monitor position overnight.
-
If you suspect dragging, reset immediately — don’t wait until the boat drifts into danger.
7. Retrieving the Anchor
To weigh anchor safely:
-
Start the engine and move slowly toward the anchor while retrieving the rode.
-
When directly above it, pull vertically to break it free.
-
If it’s stuck, try gently easing slack and approaching from different angles — avoid pulling sideways under tension.
-
Once freed, rinse mud and debris before securing.
Never use excessive engine power; that can snap gear or damage fittings.
8. Using Two Anchors
In strong current, shifting wind, or crowded anchorages, a two-anchor setup increases safety.
Bow and Stern Anchors
-
Prevents swinging — useful in narrow rivers or near docks.
-
Set the bow anchor first, then back down and drop the stern anchor.
-
Leave slight slack in both lines to absorb motion.
V-Anchor (Bahamian Moor)
-
Two anchors from the bow at roughly 45° angles.
-
Provides excellent holding when wind shifts direction overnight.
Avoid crossing rodes with nearby boats, and always recover anchors in reverse order.
9. Common Anchoring Mistakes
Even experienced boaters make these avoidable errors:
-
Too little scope: Anchor drags easily in wind or waves.
-
Throwing the anchor: Prevents proper set.
-
Anchoring by the stern: Dangerous — waves can swamp the transom.
-
Ignoring tides: Water depth may change dramatically overnight.
-
Anchoring too close to others: Boats swing differently depending on hull type and rode length.
-
Leaving without checking hold: A few seconds of reverse thrust verifies security.
10. Anchoring in Emergencies
If your engine fails or heavy weather hits, a quick, well-set anchor can prevent disaster.
-
Deploy from the bow immediately to maintain heading into waves.
-
Use as much chain and scope as possible for holding strength.
-
Keep the engine ready once restarted to relieve strain on the rode.
-
Monitor for dragging and be ready to cut free if grounding becomes imminent.
Emergency anchoring buys time and stability — don’t hesitate to use it.
11. Environmental and Courtesy Considerations
Anchoring responsibly protects marine ecosystems and other boaters:
-
Avoid dropping anchors on coral reefs, seagrass beds, or shellfish beds — use designated moorings when available.
-
Reduce noise and wake near anchored vessels.
-
Retrieve trash or fishing lines fouled on your anchor.
-
Respect local “No Anchoring” or “Seagrass Protection” zones.
Good seamanship is about coexistence — with both people and nature.
12. Final Thoughts: Anchoring with Confidence
Anchoring combines skill, patience, and awareness. The goal isn’t just to stop the boat — it’s to create a secure connection between you and the seabed that can withstand changing conditions.
Before every outing:
-
Inspect your anchor gear.
-
Choose a safe, sheltered location.
-
Use sufficient scope.
-
Set the anchor firmly and confirm the hold.
Mastering these habits prevents drifting, collisions, and grounding — and transforms anchoring from a stressful chore into a confident act of seamanship. When your anchor holds firm and the boat rests quietly, you’ll know you’ve done it right.
